Friday, 25 December 2020

Stacked Text Sign with FreeCad

(with a bit of help from Inkscape and bcnc)

Warning: This post isn't beginner-friendly

Inkscape is being used for all the text work.  When using cursive font it can help to use a workflow like this:  Path > Object-to-path;  Object > Ungroup;  Path > Union

Regardless of how this is done there will be a need for node editing and joining.  When editing nodes give some thought to the diameter of the tools.  A tool can't cut an inside feature smaller than the tool radius so it makes sense to alter features to match this reality at the drawing stage.  The simple border was also drawn in Inkscape and nicer examples are available on sites like OpenClipArt.org

Import each 'word' as a separate string to the Draft Workbench to keep them easy to manipulate in FreeCad.   After importing a string of text select all and then do a Modification -->  Draft-to-sketch.

The model is made up of 4 extrusions and a cube.  The rectangular border is 0.25" proud of the base cube.  The "HOTEL" text is extruded to be 0.125" proud of the base.  The 2 cursive text strings are extruded to stand 0.25" proud of the base.  All parts are aligned and fused in Part Workbench using boolean unions.

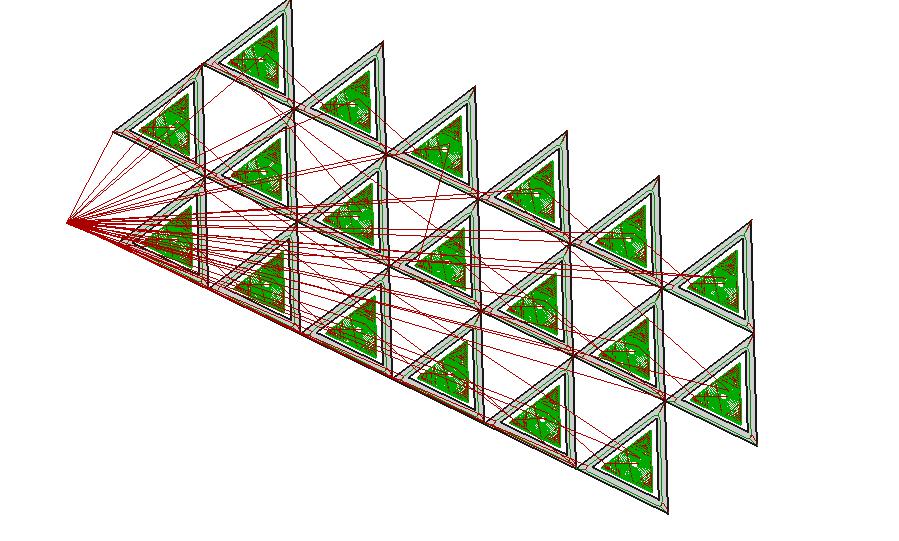
In the Path Workbench several tool paths will be needed and the UI is going to get messy.  An operation's back plot can be hidden by selecting the operation in the tree view and setting "Active" to "False" in the data panel.

The first operation was adaptive clearing using a 0.25" end mill.  Select the face of the border and then the faces of the 2 cursive text strings.  The "Cut Region" selection is "Outside" and the "Force Clearing Inside-Out" option is selected.  The depth of this cut is -0.125".  If all goes correctly this operation should not attempt to profile the "HOTEL" text string.

The next operations used a 0.125" end mill at the -0.125 depth.  These operations are finishing profiles on the cursive text and optionally the internal pockets in the cursive text.  Pocketing the letters at this stage is only mandatory if planning to apply paint/stain before continuing to the next depth of cuts. In this example the "e" in angel and an "o" in nook need to be pocketed to allow all the visible parts of the letters "O" and "E" to be painted.

Camotics Simulation


  Camotics spotted a missing pocket in the "e",  running the sim was worthwhile.

 Before any cutting, gold spray paint was applied.  Then a paint mask was used, in this case the mask was self-adhesive shelf liner.  After all the cuts at the -0.125" depth were complete green spray paint was applied.  The paint mask protected the gold paint from the green spray.

I try to keep these posts short so continued in part 2.    

Saturday, 12 December 2020

Triangle Tessellation Inlay


click to enlarge
The next attempted inlay.


 The image to the left shows the 3 stages of an F-engrave solution.  The top portion shows the v-carve of the Base.  The black outline is the material removed by the v-bit.  The white line inside the black is the centre line of the tool path.

The centre part of the image show the Base pocket clearing tool paths.  Notice the red end mill path clears up to the centre line of the v-bit path.  The yellow areas are an additional tool path using the v-bit to clear areas the end mill can't reach.

The bottom portion of the image show the inlay (male) being cut.  Not obvious here is the v-carve path being outset from the SVG path.  Turning on back plotting in F-engrave shows this clearly.


click to enlarge
Back in FreeCad.....

Same strategy as the previous inlay post.  Original perimeter paths are retained.    An inset is used to create the face for v-carving.


  The tips of the triangles meet at the corners so the best bet is making the inlays as separate pieces.  In the SVG file the path is outset.


click to enlarge
I'm still new to MeshMixer.  The gap at the bottom works out to 0.040" but appears to be 0.060" here.  At the top the prismatic over-cut is 0.050".


click to enlarge

  And this project is a practice piece before trying to reproduce the beautiful item shown to the left.  In fairness to the artisan (artist ?) a link to his work               https://cavedecorativearts.com/cube-chest              


Pictures to come.......

Thursday, 10 December 2020

Freecad Inlay Failure


This is the model for the inlay


FreeCad v-carves on a shape centre line.  Like the diamond inlay in the previous post, the strategy here is to create an (inset) outline of the original path for the v-carve tool path to follow.  In the image to the left the green area is roughly the v-carve path.  The purple areas could use a clearing path.  The problem with centre line v-carving is the tool will run deep in wide areas and may not touch the edges at all.


Unlike the diamond in the previous post this eagle has multiple paths.  Using insets on all the paths will ruin the spacing between the paths.  The finished item will not be an exact replica of the original.  To work around this spacing problem outsets will be used on the paths when making the inlay (male) part.  Looking at the output of f-engrave shows outsets are the method that particular software uses.

This might be a good time to point out an alternate way to create an outset tool path without Inkscape .  In the profile operation deselect "Use Compensation" and add the amount of "Extra Offset".  Doing it this way has the downside of not illustrating the problem in the next image.


   In the image to the left the SVG has been mirrored to make the inlay.  The blue and red paths have been outset 0.029".  The green arrow points to the problem area of overlapping paths.  A bit of moving and shrinking of paths works around this issue.  It's a nuisance but not a deal breaker.


The inlay cuts look reasonable.  The profile paths aren't easy to see due to the uncompensated tool path defined in FreeCad.


The Base v-carve tool paths look possible.

This is a view from the bottom.


click to enlarge


Ouch !  Those hills can be scraped out but the gouges look pretty real.  Mission aborted.

Bottom Line

My FreeCad inlay strategies have some limitations.


FreeCad Inlay (Part 3)

Part 2 ended with a face created in Draft Workbench.  This face will now be used in the Path Workbench.

1  Open a Job choosing Face in the first dialogue box.

2  Set the stock dimensions to have the diamond face sit on the top face of the stock.  In FreeCad speak the Z top bounding box extension should be zero.

3  For tool controllers select the 60 degree v-bit and create an end mill of 0.134" diameter.  An explanation of for the odd size end mill can be found at the bottom of this post.

4  The first operation will be adaptive clearing using the 0.134" end mill.  For the base geometry choose the 4 inside edges of the diamond.  Set the final depth of cut to -0.110".  The extra 0.010" depth provides a bit of margin of error when joining the pieces.  Some inlay makers will cut this deeper to give excess glue a place to go

5  The second operation is v-carving the face.  Select the face as the base geometry.  Select the v-bit cutter.  The other options are a bit of a mystery.


    This is roughly what the tool paths should look like.  Rotated 90 degrees here to save page space


click to enlarge


This is a view of the tool paths in Camotics.  The little 'pyramids' in the corners are spots the clearing end mill couldn't reach, easy to scrape out.  The gouges seen in the corners are real but not deep,  they are not visible in the assembled piece.


    This is the finished piece.  A bit of chipping on the top and bottom points as a result of over aggressive v-cutting of the inlay.  Overall not horrible.


Final thoughts

This was a lot of effort mostly due to the number of calculations and amount of planning involved.  The good news is a lot of this work can be recycled in future inlays. So can FreeCad make inlays ?  Yes and No.  The next post will show how the strategies used in this post can fall apart.

About that weird end mill


What the image above attempts to show is the form created by the v-bit.  The yellow represents the base.  The black triangle needs to be removed.  The problem is the bottom of the V is not selectable in the FreeCad model.  To work around this I used an end mill 0.058" larger in radius than FreeCad 'believes' is being used.

Using a 0.250" diameter end mill:

0.250 - (2 * 0.058) = 0.134

A 0.134" tool controller is used to create the tool path.  For actual cutting a 0.250" is substituted.

Another approach would be creating an extra model representing the centre of the v-carve path.  There may be a third option but I don't know every trick available in FreeCad. 

Wednesday, 9 December 2020

FreeCad Inlay (Part 2)

 This post will be using the SVG saved as Base in Part 1.

Click image to enlarge

This post will be focused on the red base in the image above.  The same 60 degree v-bit from Part 1 is used.  Take note of the 0.100" depth of cut,  the 0.050" prismatic over-cut,  and the small green triangle representing the prismatic offset.  There is a note mentioning sanding to create the other gap shown but I haven't found this to be necessary in practice.

Oh No ! It's trigonometry !


  The triangle on the left represents the green triangle in the sketch above.  To achieve the .050" gap the perimeter of the Base pocket needs to be inset 0.029"

tan30 * 0.050 = 0.029


The tool path for the v-cutter also needs to be inset.  In the image to the left the blue triangle represents the material the cutter will be removing removing to achieve a 0.100" depth of cut.

tan30 * 0.100 = 0.0577

0.0577 * 2 = 0.1155

0.1155" is the full width of cut


A description of what happens next

The image on the left is the Base SVG modified for illustration purposes.  The thin green outer border represents the full size of the Base SVG.  This green border is 0.029" wide and will be deleted.  The red represents the 0.1155" wide v-carve cut.  The green area in the interior will be removed in a clearing operation.


Yikes ! It's Inkscape !

Inkscape 0.91 is used here. 

You were warned this was coming in Part 1.  The Base SVG is modified here.  Get rid of any fill and apply a stroke if necessary.  Set document properties to inches.

1  Edit -> Preferences -> Behaviour -> Steps.  Change Inset/Outset  to 0.029"

2  Select the path outline and then apply Path -> Inset.  This will be the pocket perimeter.

3  Return to Preferences and change the steps to 0.1155"

4  Make a duplicate of the current path.

Apply Path -> Inset

Select the outside path and apply a black fill.  The SVG should now look like a solid black diamond.

7  Ctrl + A to select all.

Path -> Difference.  If all went well there should be a black diamond perimeter with a white centre.

Save the file as an Inkscape SVG

Finally FreeCad Time

1  Import the SVG into the Draft Workbench

Select the outside path then the inside path.  These may be a bit obscured.

3  Modify -> downgrade to create a cut.

Repeat Modify -> downgrade to create a face.


This post got too long.  Continued in Part 3     
 

Tuesday, 8 December 2020

FreeCad Inlay (Part 1)

This is a continuation of the previous v-bit post.  Please scan that first.

Disclaimer:  I am new to FreeCad.  There may be easier ways to do many of the things shown in this post.  FC v0.19 pre-release is being used in this post.

The SVG file used was downloaded from wikimedia.  I believe it's this https://commons.wikimedia.org/wiki/File:SuitDiamonds.svg 


Save 2 copies of the SVG file naming one Inlay and the other Base.  In this post the copy named Inlay will be used. 

Click image for larger size


In the image above the red base piece is cut to a depth of 0.100".  The aqua inlay piece is cut to a depth of 0.150".  The aqua part is being made in this post.

Making the inlay

1  Import the SVG into FreeCad Draft Workbench. (toggle off that annoying grid).  Use Modification -> upgrade to create a face.  This seems to work best if the fill is first removed in Inkscape.  If anyone tries to follow along without a knowledge of Inkscape things will get worse in Inlay (Part 2).  The SVG should be flipped horizontally in Inkscape before importing.  In this case the SVG is most likely symmetrical,  the point is inlays must be a mirror image of the base.

2  Open the Part Workbench and extrude the face to a thickness of 0.150".  In the extrude dialogue box skip Apply and hit OK.  Apply creates a redundant copy.

3  Create a cube the length and width of the stock material being used for the inlay.  Height isn't critical but the actual stock thickness minus 0.150" would be a logical choice.  Place the cube in the appropriate x-y position beneath the extrusion.  Lower the cube's z position by an amount equal to the cube's height.  If this went well there will be no gap between the pieces and the extrusion will protrude 0.150" from the top face of the cube.

4  Click on the extrusion and the cube and create a boolean union.  This should result in a single object named fusion.

5   Open the Path Workbench.  When creating the Job choose Fusion 0 in the first dialogue box.

In Job set-up window make the top of the stock level with the top of the model.  If any facing is needed take care of it beforehand.

7 For this operation a 0.250" tool controller was used.

8  Use a pocket tool path to clear the area around the diamond to a final depth of 0.150".  If this is done right the diamond shape should be all that remains of the original top surface.

9  Using a profile op cut around the perimeter of the diamond to a final depth of 0.150".  Adjust the step downs to something sane like 0.050".  In the profile operation deselect "Use Compensation".  The logical operation to profile the diamond is the engrave tool path but it's approximation of the curves was too crude.

10  Post the tool paths. Order of operations should be pocket followed by profile.

11  When cutting the profile tool path use a 60 degree v-bit in place of the 0.250" end mill. 

This was the easy half to explain.

Part 2 gets messier.
 

FreeCad and V-bits

 This year has brought changes to Autodesk's free subscriptions.  These changes along with a general dislike of software as a service have me looking for a Fusion 360 alternative.  I gave FreeCad a brief look in the past but the CAM tools were too limited for some of my projects.  FC v0.19 is now near official release with a larger variety of tool path operations.  Some bugs remain and some things are a bit clumsy but it's becoming a legitimate alternative.  

The Path workbench creates the everyday tool paths in the usual kind of way and these are reasonably well documented.  In an effort to better understand FreeCad I'm testing some of the less commonly used path tools.  My experiments will be recorded here as notes to myself.  If they are useful to anyone else you're welcome and thanks for reading.

First up is the v-carve operation but not used in the way FreeCad intended.  The goal is combining v-carve with other tool paths to create inlays using the methods employed by F-engrave.  This has been an adventure and my respect for F-engrave has increased in the process.  This is no knock on FreeCad, Scorch's software is specialized and what it does it does very well.

FreeCad's v-carve tool path works on the concept of fitting a circular diameter to a face shape of various widths.  For example a face width of 0.100" will require a 60 degree v-bit to a depth of 0.0866".


The math in this example is pretty basic.

(0.100/2) / tan30 = 0.0866

and at full depth

(0.250/2) / tan30 = 0.2165

These numbers describe a 0.25" 60 degree v-bit


The description above is of course an over simplified description of the concept.  I believe in reality some fancy math is used involving something called Voronoi Nodes. 

Testing the numbers above on a 0.100" wide face returned weird results.  I discovered that the tool editor has bad labelling for the included angle definition.  To properly describe a 60 degree included angle cutter the value to enter in the tool editor is 120.

The math is 180 - included_angle.  ***

Another oddity, possibly connected to the glitch above,  is the connection between tool diameter and depth of cut limit.  To enable full depth of cut the tool diameter must be defined larger than actual size.   Watch out for this if intending deep cuts.

*** FC v0.19 will have a new tool bit system so these problems may only apply to the legacy tool system.  The release of v0.19 is expected by the end of 2020.

The v-carve operation includes options Discretize, Threshold and Tolerance.  I have been unable to find good definitions for these options and they may not be fully developed at this time.  The FC wiki has an example of using v-carve but these options are not described there.

Are inlays possible using FreeCad ?

Yes and No.

That's the next post.